

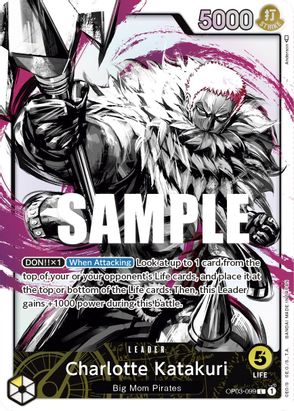
OP05 SAKAZUKI
Sakazuki is undeniably the best deck in the OP05 format. It has dominated the major tournaments in the east, winning 7 out of 8 championships. The deck thrives on its robust value mechanics, consistency, and overwhelming board control. Due to the leader’s cycling effect, Sakazuki can consistently implement its game plan and generate powerful combos.
Term Definitions:
Curve: Refers to the first turn that a character can be played based on its cost. For example, 4c Lucci on your second turn going second.
Swing turns: Turns where the game swings in the favor of one player.
Bodies: Characters on board
What makes Sakazuki different from previous control decks?
I will dial it down to three primary factors.
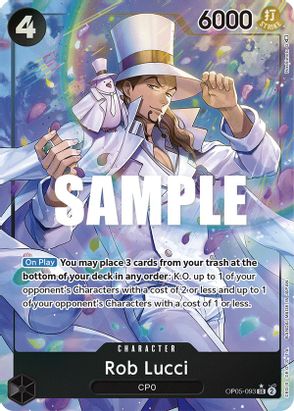
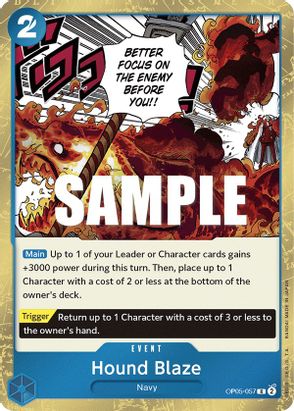
1. The efficiency of dealing with multiple characters: One of the primary difficulties of removal in the past was if your opponent consistently established multiple bodies on their field, e.g., Law, Film, Zoro, etc., you would eventually run out of resources and become overwhelmed by their board. Two cards solve this in Sakazuki, the strongest being Lucci. Lucci’s effect, in combination with your leader ability and cards like Great Eruption, Kuzan, and Hina, results in easy removal whenever your opponent establishes two characters on their board. It has both on-play removal of two characters and a vanilla stat line to deal with anything your opponent might turn sideways. The other card is Hound Blaze; it allows for low-cost, efficient removal while enhancing the pressure you can put on your opponent with your leader and your board.
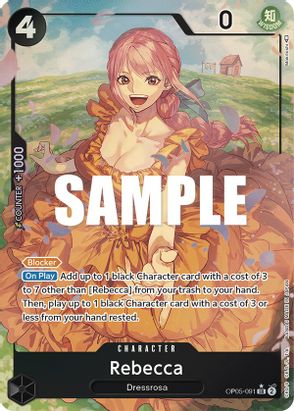
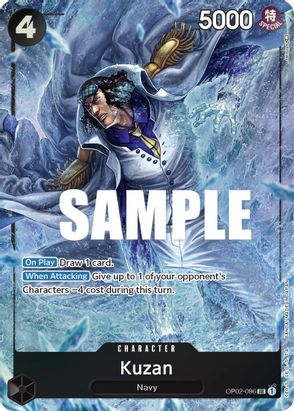
2. Resource efficiency: Black removal cards have suffered from the hindrance of requiring a discard from your hand since their release in set two. This meant that to remove one of your opponent’s cards, you were losing two cards of your own; if the card you were removing was a searcher, that alone put you in a two-card deficit to your opponent. By combining black and blue, you get all of the strength of cost reduction without the weakness of having to discard a card from hand (also, Lucci doesn’t have this weakness because of his CP typing). In addition, Sakazuki has access to two extremely resource-efficient cards in Rebecca and Kuzan. Both cards establish bodies with powerful effects for free because they replace themselves; this is incredibly powerful in allowing Sakazuki to implement its game plan for no loss in hand size.
 .
. 
3. Cycling: A cycling leader ability is incredibly powerful for a control deck. You gain a lot more choice in developing your hand to match how your opponent establishes themselves throughout the game. It also allows you to play many non-counter cards that may be too risky for other decks. This will enable you to adapt to many scenarios and combat your opponent's board. A cycling effect combined with access to the discard through Rebecca and Mansherry means that you don’t need to be particularly cautious about what you throw away as you develop your hand.
How I play the deck:

In this deck, I focus on finding an optimal balance between characters on my opponent's board, blockers on my board, and my life. Suppose you can maintain an advantageous state in these categories as you naturally establish oppressive bodies with removal effects (Lucci, Borsalino, and Mihawk). In that case, you can prolong the game to the point where your opponent is simply out of options.
There are many ways to build this deck; I will talk specifically about my list above. What cards you choose can be particularly relevant in deciding your curve. Because I am playing Sanji’s Pilaf, my curve is usually optimal going first. Aside from the matchups where I don’t follow that curve (which I will outline below), I mulligan for Pilaf as my turn two play every game. I know that between the draw off of Pilaf and my leader ability I will be able to find the other cards I need.
Thus, a typical going-first curve goes something like this:
Turn 1: Cycle from leader effect, prioritizing 2k counters, Hina, Mansherry, and duplicate cards for the discard.
Turn 2: Play Pilaf, cycle with the same priority as turn one, typically until turn five.
Turn 3: Assess your opponent’s board state and the removal potential of your hand. If they have established no characters, you want to play Borsalino or Kuzan. Both cards force your opponent into an awkward situation, Borsalino forcing your opponent to attach an extra DON!! to their leader each turn and Kuzan pressuring imminent removal on whatever they play down. Typically, you can prioritize Borsalino for more aggressive decks like Law or Zoro and Kuzan for decks more reliant on their top end, like Katakuri or Purple Luffy. If your opponent has established a body, your priority will be removal. If the established character has an on-K.O. effect, the goal will be to use a reducer (most optimally just your leader ability, then, if necessary, Great Eruption, then Tashigi, then Tsuru) in addition to hound blaze to bottom deck it. In most other scenarios, you will want to establish Lucci because he generates a strong body and can take care of up to 2 characters your opponent has placed down.
Turn 4: If you can play down 7c Borsalino on this turn and remove your opponent’s most threatening body, you will be in a solid position here. The way this card can swing the game by eliminating a 5c or lower (because of leader ability) and establishing an 8k body that most decks can’t remove is incredibly strong. This can be further enhanced if you already have a Kuzan or Tashigi on the field. Borsalino is always my most desired turn four play.
Turn 5: By this turn, you will generally know what kind of pressure you need to place on your opponent to win the game. With that information in mind, you can start cycling out unnecessary cards in search of counter. If your opponent has an 8c or lower character as their primary body, Mihawk is very strong here. Otherwise, you can implement combos to deal with your opponent's board and establish blockers to prolong the game.
Going second curve:
Mulligan for 4c Borsalino. Borsalino acts as a +1k counter every turn if you use it effectively by guarding your opponent’s final swing or an earlier swing if you can counter their subsequent attacks at Borsalino without losing too many cards.
Turns 1 to 4: Prioritize using your leader ability every turn. Establishing a trash is very important to utilize Rebecca, Mansherry, and Lucci effectively. What to trash:
- Duplicate cards
- Hina
- Tashigi
- Tsuru
- 7c Borsalino (it can be a brick in early turns or if your opponent is building a wide board)
- Other non-counter cards you don’t plan on utilizing in the next three turns.
Turn 1: Brannew
Turn 2: 4c Borsalino is almost always the best play here, except against Law when you can clear your opponent’s board with Lucci. Kuzan, Pilaf, Brannew, and Lucci as a Vanilla are strong secondary options.
Turn 3: Combo to remove your opponent's board. Rebecca into Hina + Hound Blaze is powerful if your opponent has just established a 5c. Lucci + reduction if they have developed two characters. Don’t be afraid to use Tsuru for reduction if necessary.
Turn 4: Same as the going first curve, but you can combo Borsalino with Tsuru or Great Eruption to remove up to a 7c body.
Turn 5: Mihawk/removal combos to wipe your opponent’s board. Typically, you will switch to prioritizing counter and defense in hand here, especially if you have two solid bodies of Lucci/Borsalino/Mihawk established to pressure your opponent’s life.
Sakazuki Combos:
Primary combo: Rebecca + Hina
Rebecca and Hina are one of the bread-and-butter combos in this deck. In the early game, you typically won’t get much value from Hina, and it is easily trashed with leader ability for later use. This combo for the cost of 1 card establishes a blocker, a vanilla statted 5k character, and a reduction effect for just 4 DON!!. Combined with a Lucci, this can lead to an establishment of three bodies on your field with the potential removal of two characters on your opponent’s field with a total of up to 12c (assuming two Tsuru/Great Eruption).
Mansherry for Rebecca:
Your primary Mansherry target is Rebecca. By searching for Rebecca from Mansherry and playing it to get a character from trash, you effectively establish two blockers (because your opponent cannot allow Mansherry to sit on the field) for 0 card cost from hand. Off of Rebecca, you can grab a Tashigi for the 2k counter, or you can get a body to play down to fulfill your defensive or offensive goals.
Tips for playing the deck:
- Avoid tunnel visioning into playing a card off of Rebecca. Rebecca already receives immense value by being both a blocker and a discard searcher. You will often achieve more value by holding a 3c in your hand, which can then be used on later turns for its effect or to counter or cycle. You usually don’t need the extra pressure of a 5k Hina on board as much as you need a hand advantage to implement your combos.
- Prioritize efficient board removal each turn. Optimally, your opponent will end each turn with no characters on board. Consider at the beginning of your turns how you intend to achieve this goal (through what reduction and removal combos). If this task requires too many cards or results in cards being used inefficiently (such as only using Hound Blaze’s removal effect without the buff), then you should reconsider your turn. If it is impossible to implement efficient removal, then you must consider how threatening your opponent’s character is and decide whether it is worth being inefficient. Otherwise, your options are to play aggressively and force your opponent to deal with your characters or to establish blockers that will allow you to prolong to the next turn, where you can implement better removal or push for the game.
- When returning cards to the bottom of your deck with Lucci or Mansherry, prioritize returning cards that cannot be retrieved with Rebecca (black characters cost 3-7). When those options are unavailable, you must consider what cards you have duplicates of in your hand and discard and what cards you will need in your subsequent turns.
Matchups:
Here, I will outline how the curve and tips differentiate for different matchups and what factors to look out for from your opponent.
Enel:
I choose first because I want to play Pilaf turn two and offset their Gedatsu, Enel, and Yamato curve. Enel can combat Sakazuki most effectively when implementing a life starve strategy. They establish their high-cost characters: Enel, Katakuri, and Yamato, without attacking Sakazuki’s life, resulting in the Sakazuki player running out of the necessary combos and resources to remove Enel’s characters, until eventually Enel’s board is established so that they can win the game in one or two turns. The most effective strategy I have found to counter this is by developing two high-cost characters (a combination of Borsalino and Mihawk) and using these characters to whittle down Enel’s hand to the point that they won’t feel comfortable just playing down one character every turn.
On your 7 DON!! turn, expect your opponent to have just established a Gedatsu or an Ohm; your optimal play here is almost always to play 7c Borsalino and remove one of those characters. This will be a primary attacker for the remainder of the game; their only answer to it is a Katakuri, which will result in you obtaining more life and thereby being in a more comfortable defensive position. You will also be in a solid offensive position if you have a Mihawk or a Borsalino with Reduction effects to bottom deck the Katakuri they used to remove Borsalino.
Attacking Enel’s life can be complicated; I will summarize my strategy here. You should be comfortable putting Enel to 1 life; from that point, the complexity comes into play. You only want to attack Enel’s final life if you have a subsequent attacker to follow up with; otherwise, you will only lose value to them getting a cycle effect with their leader. As long as you have a second attacker, you can force them to lose counter from hand or go down to zero life. This limits their play options to only Katakuri, Yamato, or a push for game because Enel is unlikely to survive through a turn they end at 0 life. Borsalino and Mihawk are powerful secondary attackers, as they will force 2+ cards from your opponent's hand and are difficult for your opponent to remove. Each turn, your goal should be removing your opponent’s characters; if that is too costly, you should establish blockers. Then your remaining DON!! should go to taking cards from your opponent’s hand with your attackers. Generally, you can do this consistently with two characters and your leader, which can pressure your opponent to zero life even when they start at two. You always want to attack with your leader first because if your opponent counters out of that attack, you can choose not to attack with your characters. If your opponent is life-starving, you always want to minimize the number of character targets they can attack.
Three cards to beware of are Gedatsu, Two-Hundred Million Volts Amaru, and 7c Enel. Gedatsu can be especially punishing when your opponent plays it directly after you have developed a Lucci, Rebecca, or Kuzan. To play around this, try to prioritize only playing Borsalino or less valuable bodies like Hina and Brannew prior to your opponent’s five/six DON!! turn. Two-Hundred Million Volts Amaru is particularly strong against Sakazuki as it rests both of our primary blockers (Borsalino and Rebecca) and effectively gives your opponent an extra offensive DON!!, beware of this card primarily as your opponent gets closer to their lethal turns, but also be considerate of how they can use it to clear your board by allowing your opponent to rest and attack your cost four or less characters. 7c Enel is difficult to deal with unless you already have a 7c Borsalino established; this is one of the primary reasons you want to play Borsalino on curve. Enel becomes easy to deal with through Borsalino because you can attack it for 9K and then use a removal effect on it; this is likely to remove Enel and, at minimum, forces them to lose two cards (the trashed life and a counter event).
One final tip is not to allow Shirahoshi to sit on your opponent’s board. Although it may appear non-threatening, leaving it as a target for Katakuri to add to life is too risky. The value they get through the hand cycle facilitates the counters and high-cost characters they need to implement their game plan continually.
Purple Luffy:

The most oppressive card in this matchup is 5c Magellan; I expect most purple Luffys to play 4 Magellan in anticipation of a Sakazuki meta. Magellan is so strong because it is basically non-K.O.able in the early game. Losing two DON!! early is too punishing. Therefore, Sakazuki’s only removal options for it are bottom deck cards: Hound Blaze, Borsalino, and Mihawk. However, using either Borsalino or Mihawk becomes difficult when Magellan’s effect throws off your curve. This means that your only option to remove Magellan in the early game is Hound Blaze. If your opponent is going second and using their leader ability, they can play Magellan turn two and leave you with only 4 DON!! to remove it. Therefore, you must have the Hound Blaze, a Tsuru/Great Eruption, and an attack from your leader. Because of this, I choose to go second in the matchup to increase my chance of drawing this combo, decrease my opponent’s chance of drawing Magellan, and stop them from playing Magellan turn 2. Going second also lets you remove Magellan by playing Hina and Hound Blaze. Once you reach 7 DON!! Magellan is not much of an issue because it can be removed by a leader ability + 7c Borsalino.
Some other cards to beware of include Paulie, 9c Kaido, and Sheep’s Horn. These cards can be used to swing the board in their favor. Play around your opponent establishing Paulie by not putting down a 4c character (other than Borsalino) when your opponent is going to 6/7 DON!! 6 DON!! is included here because your opponent will use leader ability to go to 7 if they can achieve a substantial Paulie board swing. Beware of 9c Kaido, and consider that the card can be used to clear your board just as effectively as it can be a game closer. The last card to watch out for that many Luffy are opting for is sheep’s horn, which for 2 Don!! (potentially one if your opponent has 5c Kidd on the field) allows them to rest one of your characters six or less. This can enable them to develop lethal turns that may be difficult to anticipate; it is worth considering when you are running lower on life and resources.
Establishing Borsalino early, particularly on your second turn when starting second, saves you a lot of counter against Luffy. Typically, on their third turn going first, they will play Magellan, and if you have Borsalino on board, you can block their 5k leader attack safely. There are a few turns where your opponent will want to use all of their DON!!, Borsalino effectively takes advantage of this by mitigating their leader's attack. Don’t be scared to use Borsalino as an attacker; I find myself attacking with Borsalino roughly 75% of the time because my opponent’s board is empty, and I want to pick cards out of their hand.
The main takeaway is to go second, hold Hound Blaze and, reduction early game for Magellan, and establish 4c Borsalino early.
If you do have to go first, follow the typical curve to the best of your ability with Sanji’s Pilaf as your optimal turn two play, followed by 4c Borsalino.
R/P Luffy:
The most crucial turning point in this matchup is the turn after your opponent plays down 7c Kidd. You must hold removal for this turn because if you can’t get Kidd off the board here, you will quickly become overwhelmed with high-cost characters you cannot deal with. You should choose a going-second curve to enhance the likelihood of pulling this off. The reasons for this are: #1, your opponent will need two ramps instead of 1 to play Kidd on their third turn; #2, you get an extra draw to increase the likelihood of drawing the combos necessary to remove Kidd; #3, you can play 4c Kuzan on your second turn. Luffy lacks many removal cards, meaning 4c Kuzan can stick to the board and make high-cost character removal substantially easier. R/P Luffy typically will only play one character per turn; if you can remove that character and place down a blocker to protect Kuzan each turn, you will be in a very powerful position.
Another way in which I play this matchup differently is how I counter. This deck typically attacks in such a way that requires you to counter with 2+ cards. To still get efficient value out of my counter cards, every time my opponent swings 6K with their leader, I will counter with a 2K. This means you should be more diligent about discarding your 2Ks with leader ability early in the game.
There are quite a few cards in this matchup that you need to make a mental note of. The first one is 4c blocker Law, which for DON!! -1 allows your opponent to trash two random cards from your hand if you have seven or more. I choose not to play around this card because if I do, it allows Law to generate value for my opponent without even being played. I am okay with taking the hit of the 2-card discard because a 4c character is much easier to remove than most of their characters and the DON!! -1 can throw them off their curve. You should play around it in scenarios where you can counter instead of taking a life that would increase your hand size to 7. The next card is 10c Luffy (Nika); you must prepare for your opponent to swing with their board, in addition to a 7K (Leader +1 Leader ability) 10K and 12K attack. This will frequently be their finishing move, and establishing Rebecca beforehand can significantly hinder its strength. You can play extra safe by having a 4c Borsalino sitting behind Rebecca that you can use if your opponent plays 1c Nico Robin, which can remove Rebecca for 1 DON!! and still allow your opponent to attack 7K, 9K, 12K.
Try to go wide with your board to implement as many swings as possible because most of their counter is high value, and the lowest swing that you can get through to their leader can often take a 2-4K counter. Sometimes, it is okay not to swing as long as you remove your opponent's board. Establishing bodies you can then attack with on the turns when your opponent can’t buff their leader is powerful.
Sakazuki Mirror Match:
I choose to go first in this matchup to implement the extra pressure of the first attack, play Pilaf turn two, and establish a 7c Borsalino on curve.
You can get ahead in this matchup in three primary ways: Cards with Draw effects, 7c Borsalino/Mihawk, and playing multiple characters on the same turn.
Cards with draw effects include Mansherry, 4c Kuzan, Sanji’s Pilaf, and Rebecca. This mirror match is largely decided by hand size because it directly relates to each player’s potential to implement board control. If you have already accomplished board removal against your opponent, using any of these cards to fill the remaining DON!! spots can put you in an advantageous position. You should expect every character you play to get removed, which means that any character that replaces itself with another card gains value because you lose no cards for it despite your opponent expending resources to remove it.
The Sakazuki mirror match is primarily decided by how many turns you can start with characters on your board. Both Sakazukis intend to remove their opponent’s board each turn to minimize this opportunity. I will make my opponent run out of removal options by continually creating board states that are difficult to remove and cost me as few cards as possible to achieve this. The turns you start with characters on board are your primary opportunity to push at your opponent’s life and develop a win condition.
Very relevant swing turns occur in this matchup at 7 and 8 DON!!. 7c Borsalino is an incredibly strong play at 7 DON!! because all of the cards that Sakazuki can play prior to this turn are 5c or lower and thereby removable by Borsalino. The 8 DON!! turn then becomes critical because the player that went second can play their own 7c Borsalino with a Great Eruption/Tsuru and leader ability to remove the first one. The answer to the second Borsalino is then, most optimally, another Borsalino or a Mihawk. I force this Borsalino war because most Sakazuki decks only have two Borsalino and no Mihawk, which means I can come out on top with the last standing Borsalino/Mihawk. Establishing these higher-cost characters will take at least two cards from your opponent’s hand to remove them; if you can exchange your one 7c Borsalino for a character removal + 2 cards from your opponent’s hand, you are generating a valuable advantage. Due to the importance of these turns, I avoid cycling Borsalino and Mihawk.
The primary combo that establishes multiple characters simultaneously is Lucci + Rebecca to play Hina. This places two characters on your board that can attack without DON!! commitment and a blocker for only 8 DON!!. This creates value similar to Borsalino because it establishes a threat that will take your opponent multiple cards to remove.
The last factor of this matchup that I want to touch on is countering; minimizing your opponent’s threat to your life is very important to allow the development of removal characters every turn. You don’t want to have to continually worry about playing blockers in addition to your removal. I want to maintain a healthy life total to facilitate this, and because of that, I choose to counter whenever it only takes one card from my hand, as long as I already have the removal I need to deal with my opponent’s board next turn. This countering method includes turns that you typically wouldn’t counter, such as when you are at four life. I have found that maintaining a life advantage as much as possible makes this match far more comfortable.
Katakuri:
I consider this to be Sakazuki’s worst matchup. This is primarily due to two cards, 10c Big Mom and Two-Hundred Million Volts Amaru. Katakuri has adopted four copies of Amaru to circumvent its primary weakness of low-cost blockers. In the past, Katakuri could be defeated by going down to zero life and continually playing blockers they couldn’t deal with. This is no longer effective as at any point in the late-game, Katakuri can now rest these blockers while effectively gaining an 11th offensive DON!! through Amaru. Thus, the first factor in this matchup is trying to prevent Amaru from gaining full value. This can be achieved by taking advantage of the stipulation on Amaru that you must be at one life to rest a character. You can accomplish this by not putting your opponent to one life unless you can survive into your next turn despite Amaru. Beware of the possibility that Katakuri can play a thunderbolt to activate Amaru even when at two lives. 10c Big Mom has always been an oppressive card, and it is certainly felt in this matchup because it causes blockers to be insufficient to protect life so that they can be rested by Amaru later and gain much less value. Big Mom being 10c also makes it difficult to remove. Therefore, when possible, you want to hold Great Eruptions and Mihawk for Big Mom.
I choose to go second in this matchup to delay Big Mom by one turn and to play 4c Borsalino on curve. I find Borsalino to be the optimal play at 4/5 DON!! In the early turns, Katakuri primarily attacks 5k or 7k, so Borsalino can function as a 1k counter every turn. Then, in the later turns, Katakuri will often use all of their DON!! for their high-cost characters and be forced to only swing 5k with their leader, allowing for a free block. Although your opponent will likely have a Perospero on board at your 4 DON!! turn, it is better to have the Borsalino established for its subsequent value than to Hound Blaze the Perospero. Using Hound Blaze on Perospero is your next best option if you do not have 4c Borsalino. If your opponent attacks for 5k with Perospero on their third turn, avoid taking the free block, as Katakuri typically does not have a great play here and will likely just commit their 5 DON!! to swinging 12K at Borsalino.
On turns 4 and 5, the primary goal is to play back-to-back Borsalino/Mihawk. If you can establish these two bodies, you will more effectively remove cards from your opponent’s hand to develop a win condition. Be careful with your swings not to put yourself into an unfavorable position if your opponent triggers a character. Also, be careful not to unnecessarily attack your opponent’s life, given the condition that you have a guaranteed win on your next turn without giving them the life; giving your opponent extra chances to find Amaru can be avoided that way.
Take your first life and then try to counter when it only costs 1 card from your hand. You want to have at least two lives when your opponent plays down Big Mom; otherwise, you will have a difficult time recovering to a state where one or two Amarus does not lose you the game.
While clearing your opponent’s board, turn a character sideways whenever possible by attacking or using Rebecca/Mansherry. This can force your opponent to attack these characters as opposed to your life, which is beneficial because they are often attacking for numbers that require 2+ cards to counter; if this attack can instead be absorbed into one character, it is valuable.
Card Choices:
The base of Sakazuki is roughly the same for most players.
I consider my staples to be:
4x Hina
4x Tashigi
4x Brannew
4x Lucci
4x Rebecca
4x Hina
4x 4c Borsalino
2x Mansherry
4x Hound Blaze
4x Great Eruption
2x 7c Borsalino
2x 4c Kuzan
This means I have 8 flex spots.
I have filled these 8 spots with:
4x Sanji’s Pilaf
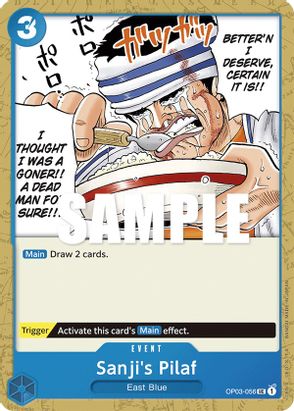
This card allows you to match your opponent’s extra draw on a going-second curve while maintaining the extra aggression of going first. Establishing this early hand size will enable you to develop more combos and have more card options to cycle with. It becomes an easy cycle later in the game or can allow you to push an advantage even further if you are in a comfortable position to play it later in the game. Not to mention that the trigger can be absolutely game-changing.
2x 7c Borsalino
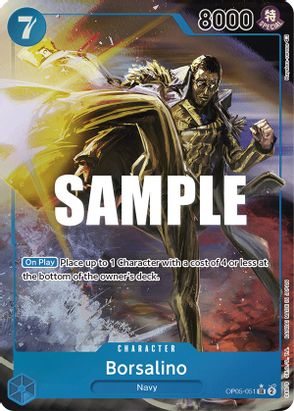
Games will dramatically swing in your favor whenever you can play this card comfortably. There are a lot of strong 4c and 5c characters in the game right now, and in combination with your leader ability, you can easily remove these cards and establish a body that is unlikely to leave the field for the rest of the game. Borsalino is typically the primary attacker that I use to close games, as I sit comfortably behind blockers and removal. I want to see this card every game, so I opted for the four copies.
1x Coby
![Koby (Offline Regional 2023) [Winner]-0](https://product-images.tcgplayer.com/fit-in/411x411/483180.jpg)
In a lot of games, I found myself wishing that there was some form of removal that I could retrieve and play from Rebecca’s ability. Koby comfortably fit that spot. I find myself just cycling it with leader ability in most games. Still, Koby being in the discard allows me to play more comfortably, knowing that I can establish a blocker and remove a character with just a Rebecca and 4 DON!! I didn’t include this card on my discard priority list, but unless you plan to combo with it in your next turns or need the 1k counter, Koby should be your first priority discard.
1x Mihawk
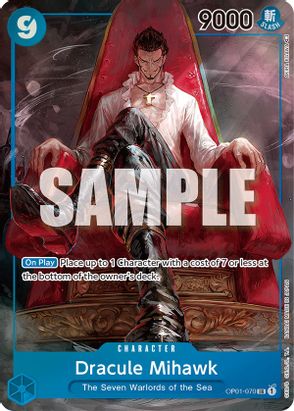
If your opponent’s board is minimal enough or your blockers are well enough established, Mihawk can shift the board state dramatically in your favor. You can most commonly gain this advantage after your opponent plays 7c Kidd or 8c Katakuri. This card is powerful once you have reached the DON!! necessary, but it can be a harsh brick early on. That is why I have kept it at one copy. That means I can hold it and play into it without cycling it because I’m worried about bricking with multiple in hand.
Other Options:
3c Hina
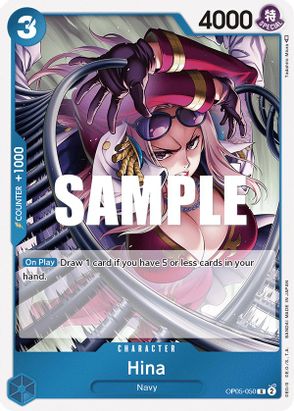
I have found Hina to be underwhelming in comparison to Pilaf. Drawing two cards with Pilaf generates a +1 card advantage that I find more valuable than a 4K character in the early game. To apply pressure with the Hina, I must commit a DON!! or Hound Blaze it, and I would generally prefer to use that DON!! elsewhere. Hina has been touted as beneficial in the mirror match to combo with Hound Blaze on your third turn, but in testing, Hina has never been able to stay on the board going into the third turn.
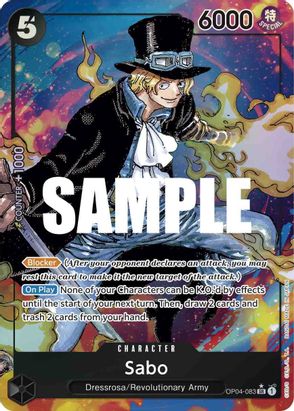
5c Sabo
 .
.
Sabo gets incredible value if played on specific turns against Yellow and the mirror. Sabo allows you to play around the thunderbolt/amaru combo that Yellow uses to close out games because of its effect and 5k statline. If you can establish a Sabo on the turn before your opponent would go for this finishing play you can swing a board state dramatically in your favor and survive an extra turn. In the mirror comboing Sabo with other characters puts your opponent in an awkward position as it is difficult for Sakazuki to bottom deck more than one character per turn except with specific hound blaze combos. Having the 4 Borsalino and Mihawk has generally felt more favorable for me than 2 Sabo against the mirror, but if you expect yellow to be more prevalent you could cut the 4th Borsalino and the Mihawk for 2 Sabo.
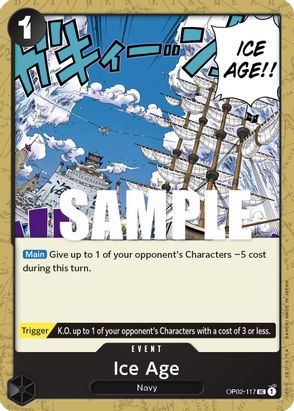
Ice Age
Ice Age lacks the flexibility that most cards in this deck have. It is a situational card that is incredibly combo-reliant and generally presents less value than a great eruption when attempting to remove a 7c or lower character and less value than a Rebecca into Hina when removing an 8c or higher. It still can be beneficial into decks that spam 10c characters if you can’t get a kuzan to stick, because you may lose too much value comboing to remove a 10c. You could reduce the 7c Borsalino/Mihawk count to add 1-2 ice age.