

Top 16 Smoker Article
CoreTCG REGIONALS RESULT:
13/1024
R1 Zoro ![]()
R2 Zoro ![]()
R3 Lucci ![]()
R4 Zoro ![]()
R5 Law ![]()
R6 Lucci ![]()
R7 Law ![]()
R8 Whitebeard ![]()
R9 Kin’emon ![]()
R10 Katakuri ![]()
Going into this event, my expectation of the meta was a field filled with 50% Zoro. Going into a relatively unknown OP03.5 format, an aggressive deck is the optimal meta-call for average and high-level players. Zoro’s leader ability facilitates the aggro line of play most optimally. From reviewing multiple media sources and talking to my testing partners, high removal Zoro with up to 4 fire fist AND up to 4 jet pistols seemed like the strategy that the community was primarily leaning towards.
Initially, from a theory perspective, I wanted to bring Kin’emon because it has a low commitment for characters that had to be removed by a higher effect commitment in Zoro, e.g., playing Okiku for 2 DON!! to be removed by either jet pistol, which is a 4 DON!! commitment, or fire fist, a 3 DON!! 2 card commitment. Kin’emon felt incredibly strong into Zoro when I was testing it before the second Peoria Regionals in OP02, and as a result, I thought that would carry into 03. I failed to adequately consider OP03 Buggy (a 4-of staple in most OP03 Zoro lists). Due to Buggy being unable to be K.O’d by Slash characters, the only way to stop it is by attacking with Izo or Yamato. This meant that Buggy would frequently stick to the board and get overwhelming value, so it was back to the drawing board for me.
Coming off the same consideration of reducing the value of Zoro’s removal cards, I looked to Black. With the addition of Fukuro in OP03, Black now had access to 4 powerful cards that could not be K.O’d by effects. The Defenders: Fukuro + Borsalino, and The Attackers: 3c Smoker and 5c Smoker. The first part of building the deck was adding 4 of each of these. From there, my goal was to build the deck entirely to beat Zoro and then, after testing, adjust for other matches accordingly. This meant starting the deck with 12 2k counters. This is because Zoro will frequently swing for 6k, e.g., lead ability + rush Zoro, Magura/Makino +2k searcher + leader ability, leader +1 DON!! to activate its ability. The best 2K counters were Garp, Tashigi, and Tsuru.
Next, I wanted to add consistency cards to the list; these came in the form of Brannew and Kuzan. Kuzan might initially appear to directly conflicts with the initial game plan of making cards such as fire fist and jet pistol ineffective. Kuzan does become an instant target for these otherwise dead cards; however, because Kuzan replaces itself with another card, it can allow you to gain a hand-size advantage against Zoro. Kuzan leaves you with no change in hand size after establishing it on board, but Zoro commits either Fire Fist or Jet Pistol to it, which leaves them at a -1 or -2 hand size in comparison. Brannew is an insane searcher for the deck because it can find 42/50 cards in the deck, the 8 unsearchable being only Fukuro and Brannew itself. This allows you a lot of flexibility to choose what cards you may need for different scenarios and matchups.
Then came the bread and butter for Black: the removal cards. I knew I wanted to play at least 2 meteor volcanoes as it allowed me to maintain control over decks like Zoro and Law that use a lot of 1c characters without trashing another card from my hand. It also combos exceptionally well with Kuzan by allowing 5c cards, such as Blocker Law, to be removed for only a 2 DON!! commitment. Sakazuki is excellent for eliminating medium-cost characters without additional cost reduction and larger characters like big mom and Newgate through cost-reducing combos. Also, by sitting at 7k power, he requires Zoro to use a power-reduction effect on him to remove him. Koby allows you to remove small characters without cost reduction and larger ones with cost reduction for only a 3 DON!! commitment while also establishing a small attacker on board. I ran three of each because the cost of discarding a card from your hand is substantial and is not something I typically want to occur more than twice in a game. The last removal effect is shockwave, a staple 4-of that can effectively stop two attacks by removing a character and defending an attack below 9K.
Lastly, I had to decide what to play as my top end. Black currently has two compelling, higher-cost characters: Issho and Kuzan. This choice was quite simple for me. With Kuzan, there is hardly any versatility, you play the card, and your turn is effectively done. You have no opportunity to play aggressively by attaching DON!! or to play defensively by holding DON!! active for Shockwave. Issho allows for both possibilities, which is incredibly important in an aggressive format. Issho’s effect also supported my play style of looking to gain hand advantage wherever possible. Often, my opponent would be at 6-9 cards going into my 10 DON!! turn. This allowed me to trash two cards from their hand while using my leader's ability to reduce a 1c to 0c and attach a DON!! to 5c Smoker and swing for 8k double attack, and then leader for 7k. It could also sometimes be played on my 8 DON!! turn if my opponent hadn’t been particularly aggressive on earlier turns.
This left me with this list:

Matchups:
Katakuri:
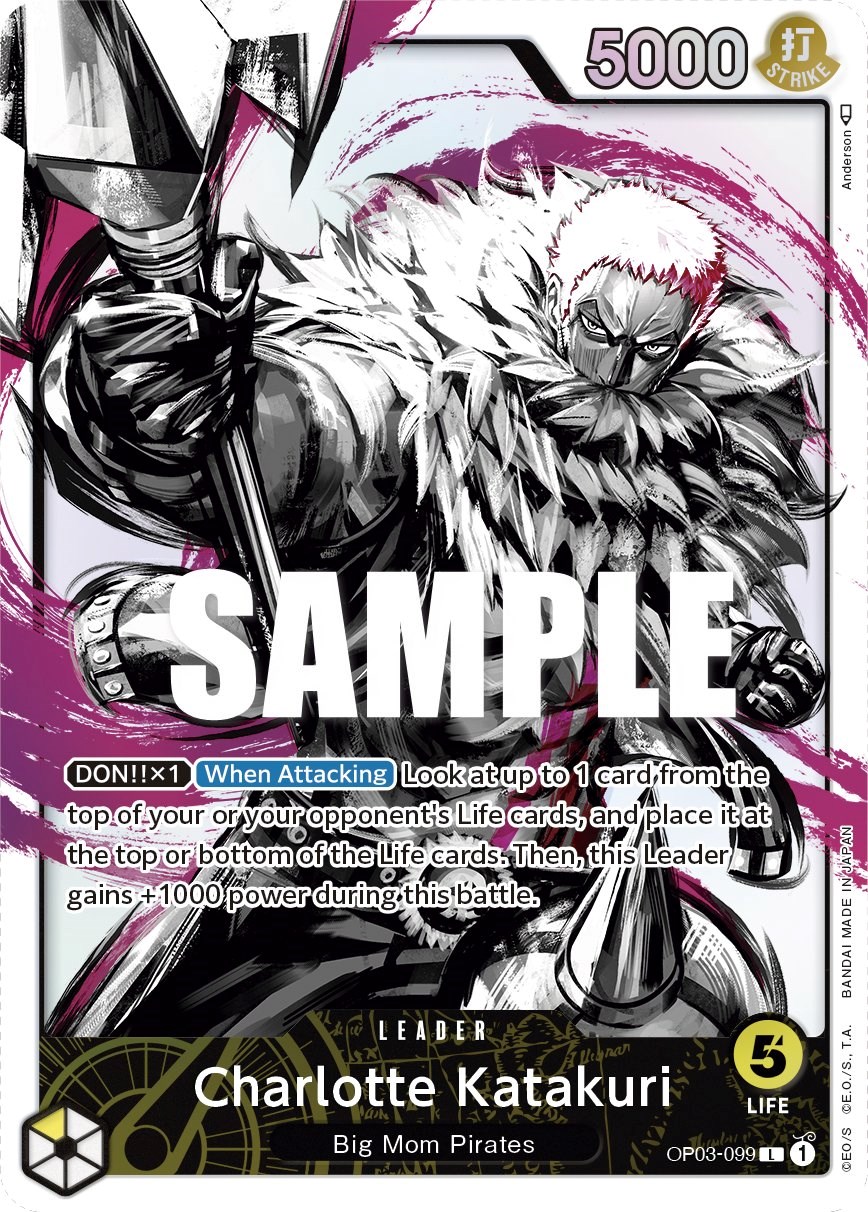
I quickly acknowledged that being as aggressive into Katakuri as possible in the early game and re-establishing with blockers later was the most effective way to win. Sometimes this game plan would fail because I missed 1 more blocker I needed in the later game. Therefore, I added 2 Donquixote Rosinante in exchange for 2 of my 2k counters.
Optimal Curve (Going Second):
Turn 1: Play Brannew to grab whatever you need more: blockers or aggressive cards (3c or 5c smoker). You never want to shockwave even if you have no other 2 DON!! play as you would prefer to take the first lives against Katakuri to avoid them being discarded in the future, and you want Pudding to stay on board to get value out of it with your leader and 2 smoker characters. If you are a Katakuri player, try avoiding playing pudding in the early game; it will return to haunt you. You can also play Donquixote Rosinante here, as they do not have any early game removal for it other than Thunderbolt, which is fine for them to waste.
Turn 2: The best option is to play Borsalino as he will stick on the board and provide an out to stopping BIG mom swings once you go down to 0 lives. He also allows you to push aggressively when given the opportunity, as he can often be protected, with an added 1k value over your leader. Your next best option on this turn would be to play Fukuro to establish a blocker that will stick until late game when he can protect you from scary 12K swings. If you don’t have access to either blocker, you will want to make more aggressive plays to put yourself in an advantageous position before they start chaining BIG MOMS. Some aggressive plays include: attach DON!! To lead, reduce pudding and attack for 7, then play 3c smoker OR attach DON!! to lead, reduce Cracker/Smoothie/Daifuku, and K.O. them with Koby. Unless Perospero is in a solid position to remove your board or win your opponent the game, it is best to avoid killing it because it allows them to flush out their curve better.
Turn 3: The two best plays on this turn are 5c Smoker or Sakazuki. If your opponent has established a powerful board (likely by activating many triggers), Sakazuki is your best play. Suppose they have used a lot of triggers; that probably means that they have fewer cards in their hand, and you can feel free to pitch an Issho off of Sakazuki’s effect. If your opponent doesn’t have a wide board, or has a board full of Perosperos and Puddings, 5c Smoker is your best play. Double attack places enormous pressure on Katakuri due to them running low counts of blockers and often countering out of early swings; just the threat of a double attack on your board can force them to play awkwardly. The next best play is 4c Kuzan; it replaces itself, so if it gets removed by Thunder Bolt out of life, it is no big deal. This Kuzan can also be incredibly threatening because it opens up their whole board to easier removal. Cracker can be removed with meteor volcano, 7c Big Mom with Koby, 10c BIG MOM with leader ability, and Sakazuki. You can now combo 4 costs with a shockwave, Brannew, or Donquixote Rosinante, so Borsalino/Kuzan can be a strong play here if you can effectively utilize your other 2 DON!!
Turn 4: If your opponent has 6 or more cards and board pressure that you can handle, you always play Issho here. Otherwise, you are typically looking to play as aggressively as possible here. Some examples are: Attach a DON!! To your leader, reduce Pudding; swing 7K with your leader at theirs; they will probably take it if you have a 5c smoker on board because they want to maximize their counter before the double swing, then swing 7k at their leader with 3c smoker with one DON!! attached, they will probably take it again. Then you can swing 7K with a 5c smoker at a rested character and play Sakazuki to remove a unit they have likely triggered out of life. If they counter out of the first swings, you can just attach 2 DON!! To double attack Smoker and play a 4c. Many of the skillful plays in this matchup come down to knowing when to swing with blockers and how to effectively utilize the threat of having a double-attack character on your board.
Turn 5,6,7…: By turn 5, you have set the stage for what kind of game plan you are pursuing, some combination of defensive: based on established blockers and lives/offensive: based on established attackers (Smokers, Sakazuki, Issho, Kuzan). From here, you have to start considering your win condition and how you can play around their BIG MOMS, triggers out of life, and Katakuri. Make sure not to allow yourself to be in a position where your threat on their life is too small to the point where they can survive on just chaining BIG MOMS, but also make sure that your board and counters in your hand are strong enough for you to survive the inevitable 1 or 2 turns where you have 0 life due to their life discarding effects. Hold onto cards like Sakazuki and Koby for either combo removal on their bigger characters or removal of trigger characters. Always swing with minimal DON!! Commitment first to leave open the opportunity for trigger character removal. You should be fine if you can do the math on their potential attack outputs and establish some of your blockers.
Worse Curve (Going First):
You can follow the same tips I have outlined for the more optimal curve, but going first forces you into a position of playing more aggressively. Therefore, you should prioritize playing aggressive cards on curve and re-establishing with blockers later in the game. This generally looks like this:
Turn 1: No play
Turn 2: Swing with your leader, play 3c smoker
Turn 3: Swing with your leader, play 5c smoker
Turn 4: Attach a DON!! to your leader, reduce pudding, swing 7k with leader, and attach a DON!! to 3c Smoker to swing for 7K, attach 2 DON!! To 5c Smoker, swing 9k double attack, then play Fukuro to protect your 5c smoker or 3c smoker if they only have one attack available.
Turn 5: Leader ability + swing, play Sakazuki, hold DON!! For shockwave. Or if you can survive the subsequent turn with no defensive action, Leader ability + swing, and play Issho.
Basically, just ride the wave of your potent turn 4 and don’t allow them the safety to play a second BIG MOM.
Whitebeard:

Whitebeard has been the most successful deck of the OP03.5 format; it is also this deck’s best matchup. Whitebeard is a highly board-centric deck; they rely on difficult-to-remove characters to secure their board state. Having 4c Kuzan and Sakazuki makes removing these “difficult-to-remove” characters a walk in the park. Whitebeard also tends to build a tall board of a few solid characters (as opposed to a “wide board” in a deck like Zoro that plays a bunch of weak characters). This is advantageous for us because, in the late game, they don’t have an effective method for getting around our non-K.O.able blockers. I didn't see any character removal in my game against Whitebeard in the CoreTCG event. Still, I was able to consistently establish 2 blockers over and over again in the late game when my opponent only had one character and his leader and no way to get around my Fukuros and Borsalinos. You can successfully follow many different game plans in this matchup, so instead of going turn by turn, I will just provide you with some tips for the matchup.
Tip #1: You don’t need to rely on Sakazuki and Kuzan entirely; your Smoker characters can still get good value in this matchup. Your whitebeard opponent will likely want to flush out their curve with their early game searchers, Izo/Nami. This means that 3c smoker becomes an incredibly valuable card in this matchup because he naturally reaches the 6k base to attack Newgate leader after you use your leader ability. If you establish 3c Smoker on turn 2 and swing with him on turn 3, he will chip one card out of your opponent's hand and tank a 6k+ attack; this is a pretty strong value for just one card in the early game. 5c Smoker can implement even stronger plays; if you play him on turn 3, then on your turn 4, your opponent will probably have 2 or 3 lives; this means that you can use your leader ability, attack a character on your opponent's field and then put 3 or 4 DON!! on 5c Smoker and attack their leader. This forces your opponent to either counter or be at 0 lives by your next turn. You can do this and still have 2 DON!! remaining for a defensive play of either Donquixote Rosinante or Shockwave.
Tip #2: Don’t be scared to remove Marco from their field. You can force your opponent to be stuck in a position where they can only lose value from saving Marco. Considering that most of the event cards in Whitebeard are counter events, they must keep most of them to protect their leader in the late game because we can remove all their blockers. This means your opponent often has to let Marco die from just a Sakazuki because otherwise, they will lose 3k worth of counter from discarding guard point. The best way to punish Marco is to play 4c Kuzan on curve, then on your 6 DON!! turn swing 6 at your opponent's leader with Kuzan and reduce Marco to 1, then you can meteor volcano Marco and swing at it for 8/9 with your leader if they revive it.
Tip #3: Don’t feel obligated to establish characters continually. The best way to combat Whitebeard is to have one or two solid attackers like Sakazuki or 5c Smoker and split your DON!! between them while supporting them on the side with blockers and removal. This allows you to always extract cards from Whitebeard’s hand without enabling them to establish a win condition. You have to judge how important pressuring their hand versus pressuring their board is at all times and try to get a read on what type of counter they have available. The main goal of this tip is to prevent you from falling into the trap of just establishing your board while they obtain a +2 hand advantage every turn.
Tip #4: Always play in anticipation of their 7 DON!! Ace turn, but don’t play in fear of it. For example, the abovementioned Smoker play lets your opponent completely clear your board with Ace on their next turn. However, forcing them to 0 life or significantly fewer cards in their hand is worth the possibility of an Ace turn. Therefore, you don’t necessarily mind that they can clear your board. Also, playing a Tsuru + Sakazuki will throw the board back in your favor anyway.
Zoro:
Optimal Curve (Going Second):
Turn 1: Play Brannew (prioritize taking non-K.O.able characters), or hold DON!! up for shockwave. In this matchup, it is okay to use Shockwave on your opponent’s second turn and remove a 1c character because they are sure to play more. Sometimes holding up the DON!! will make your opponent do 1c character swings; in that case, hold the shockwave unless the counter in your hand is shallow.
Turn 2: The best play here is typically Borsalino. Borsalino prevents your opponent from getting free 5k swings off and allows you to stop Zoro’s final turn swing (usually 7k) for just a 2k counter. Don't let your opponent extract value from an early Borsalino block with Gordon or Otama. The only time that Borsalino is not your best turn-two play is if your opponent establishes a 3c character on their second turn. Playing a Koby on this turn can be more beneficial in this scenario. Besides these two plays, you have a few different options: Kuzan can be vital for the value exchange I discussed earlier in the article, and he is valuable here if your hand is full of non-counter and you need to cycle it. Other than that, prioritizing non-K.O. able characters and board control is always substantial.
Turn 3: Play 5c Smoker. 5c Smoker is the MVP of this matchup. A double attacker that Zoro cannot use removal effects on completely changes how they play the game. It puts them in a constant defensive position, holding up DON!! for cards like guard point, the game switches into the late stages as soon as that double attack goes through. Zoro typically has few or no blockers, meaning they want to apply pressure with their board and force you to swing at their characters to avoid getting run over by their aggression. They can further decrease their opponent's focus on their life by removing their characters with powerful event removal and 5c Marco. I will frequently have Smoker on the board just for the threat of double attack, but use him to swing at characters and clear the board for no DON!! commitment. Another strong play on this turn is Sakazuki, as he is still at a problematic stat line for Zoro to remove, and even if they do, his on-play effect can put you into safer territory; you don’t want to remove Marco with him on this turn as they will probably have a lot of dead events in their hand like jet pistol and fire fist that you don’t want them to get value from. 4c/2c and 3c/3c combos are also consistently strong here.
Turn 4: Turn 4 is the decisive turn to you figure out your win condition. To do this, you must evaluate the number of cards in your opponent's hand; how many DON!! your opponent has available, the extent to which you must take vs. protect their subsequent attacks, and how many attacks it will take for you to win the game. To further explain this, I will provide a hypothetical situation:
Hypothetical:
Your opponent has 7 cards in hand and 3 lives, with a rested Dadan, a rested Marco, a Magura, and a rested Nami. You have a Fukuro and a 5c Smoker on board, 5 cards in hand, and 3 lives. Although their hand size is above 6, their board is too wide for you to play Issho because if you do, they will probably have at least 3 substantial attacks on their subsequent turn and still have a comfortable hand size (not that you have it in this hand anyway). You want to ignore Marco here because they likely have at least 1 jet pistol or fire first that they have now realized will be relatively useless. The goal should be to remove their remaining characters and push at their life with 5c Smoker.

This leaves you with two solid lines of play:
Option #1:
In this line of play, you attack Nami with Fukuro, attack Dadan with your leader, K.O. Magura with Meteor Volcano or Koby, and swing with 5c Smoker with your remaining DON!! subtracting what you need for a blocker (in this hand: Borsalino) and then play the blocker. This line of play tries to maximize the advantage of Smoker’s double attack because when it goes through, they will be at 1 life with 1 character on board, which is a very winnable position, it will force a substantial counter out of their hand to stop it, and if they did stop it, you could subsequently capitalize on board control due to their small hand size. Also, if you can stabilize after their subsequent turn with two life, you can re-establish with blockers and continue pushing with your leader + 5c smoker. You want at least one blocker to protect the Smoker from getting removed by one big swing. The weakness of this play is that your opponent, in turn, has a substantial hand that you don’t have much information on; the advantage is the considerable life advantage you get on your opponent that can be very threatening.

Edit: there should be one DON!! on leader to reduce Magura and one DON!! on 5c Smoker in order to swing 8K and force guard point +1 card.
Option #2:
You establish Sakazuki to remove the Dadan, attack the other two characters with Fukuro + Leader, swing for 7k at their lead with 5c Smoker, and hold up 2 DON!! for shockwave. This leaves them at 2 Life (3 in this situation because they had held the DON!! For guard point) so that your Smoker’s double attack is still highly threatening for the next turn. The weakness of this play is that your opponent continues to maintain a healthy life total, and if they commit to Smoker, you need to draw an attacker to get back in the game. The strength of the play is their decreased hand size and your establishment of another attacker; if they choose to swing face on their next turn, you almost certainly win by establishing both Sakazuki and Smoker behind Borsalino.

Turn 5,6,7+: The game is most likely to end on turn 6. You can choose the game length based on how well you can reduce their board size and how many blockers you can establish on your board. Build your game plan around 5c Smoker and find a path to victory!
Other tips:
If you go first: optimally you want to see Fukuro/3c Smoker turn 2, 5c Smoker turn 3, and then follow a similar line of thinking and play to what I have outlined above.
Issho is not useless in this matchup, as long as you can put yourself into a position where you don't lose on your subsequent turns as a result. Issho can be a great way to get your final swing through and can take vital cards out of your opponents hand. I won one game against Zoro only because I removed fiery doll from their hand with Issho.
Law
![Up to” Card Errata [OP-01] − RULES|ONE PIECE CARD GAME - Official Web Site](https://en.onepiece-cardgame.com/images/rules/cards/20221111/op01-002p_dummy.png)
Law is a rough matchup for this deck. It is challenging to keep up with the amount of 5k swings they can output and their insane value mechanics. The one advantage you have in this matchup is the strength of your board control against Law; you can make it difficult for them to shambles and then quickly remove their shambles targets. The issue is that they will continually be outvaluing you, they will probably be getting their Law characters for free via Bonney, and you will lose 2 cards from hand to Sakazuki them. The one Law that I lost to in the tournament did not shamble once but played Zoro, then Brook + Zoro, then Zoro, then Luffy, and the game was over because I didn’t have the counter to keep up.
Optimal Curve (Going Second):
Turn 1:
This is the one matchup where you want to play 2c Garp on curve. You want to maximize your removal potential in this matchup. Playing Garp on turn 1 allows you to use leader ability + Garp to remove one of Law’s necessary early game 1c characters. Always prioritize searcher removal so they cannot be shambles’d for extra value in future turns. A Vista play can punish Garp, but not all Laws play Vista; not all Laws will have Vista in their hand, and playing Vista instead of 1c characters on their 2nd turn will make a turn 3 shambles nearly impossible. Meteor Volcano and Shockwave can also be powerful here, but they maintain their value throughout the game more than Garp. Brannew also always flushes out your curve; remember to prioritize removal cards from the search.
Turn 2:
If you played Garp on turn 1, then attach a DON!! to your leader, reduce a 1 cost with leader ability, then attach 3 DON!! To Garp, attack their lead for 6k, K.O. the reduced 1c, and swing 7k at their leader with your leader. You can always return to the classic Borsalino if you did not play Garp. Borsalino will provide a ton of value in the first few turns to prevent 5k leader swings as they focus their DON!! on establishing their board and not being offensive. Kuzan is also great because law decks have dropped jet pistol as a removal option on Kuzan, so he can sit there until a Law comes down that can be given -4 with Kuzan and removed with meteor volcano. Koby is also great to offset their shambles, especially if they play down characters greater than 1c. If you don’t have any of these options available, you still want to establish a character here to apply pressure before they build too many blockers.
Turn 3:
What you do on this turn is primarily based on what kind of/how many characters your opponent has established. If they have not played many blockers, 5c Smoker is your best play. A double attack going through on a 4 life leader is nearly impossible to come back from, as they will not be able to establish enough blockers for you not to get the final 2 swings through. This will force them to play blockers on their next turn instead of playing aggressively. If they have played down a higher-cost/more threatening character like Law or Robin on their 5 DON!! turn, it becomes worthwhile to play Sakazuki. You don’t want to commit all 6 DON!! for just Sakazuki otherwise. Holding up 2 DON!! for shockwave can make your opponent play awkwardly because they will always want to attack with their leader, and shockwave forces them into a situation where they lose a character before shambles (which makes using leader ability more difficult), or you get more information for what to remove from their final board. Meteor Volcano is an excellent second option if you don’t have shockwave. You can remove a searcher before they use shambles next turn by reducing Dadan with leader ability or removing Nami/Bonney. Meteor Volcano/Shockwave is most effective when you have something to combo with a 4c or a 3c + 1 DON!! for leader ability. Issho is typically just a discard in this matchup; not pressuring their life or board allows them to build an advantage too effectively.
Turn 5: By this turn, you have pressured your opponent’s board to the extent that they don’t have enough characters on their field or enough cards in their hand to replenish their field, OR you have pressured their life to the point that with a few blocker removals, you can finish the game. Otherwise, you have most likely gotten outvalued and are probably losing. Continue pressuring their board and chipping away at their hand/life until you feel comfortable going for the win or have no choice but to go for it.
Conclusion
The last time I played Smoker for an event was this one, but I will be playing it at the upcoming Tulsa Regionals. Here is what my list will be for that event:

10 2k counters were not enough, so I added 2 more. Starting hands with 1-2 2k counters made the game significantly more manageable and allowed more time to build board without getting punished by every 6k attack your opponent outputs. I reduced one Brannew because when you cannot play Brannew on your 2,3,5, or 6 DON turns it becomes challenging to find an adequate opportunity to put him on the board. I reduced one Issho because I had a few games where I had 2 Issho in hand from the start, and it would feel clunky and challenging to play around. I also cut my third Koby for a fourth Sakazuki because the value of putting a 7k body on board is significantly more remarkable; many games that I struggle in are directly the result of not seeing Sakazuki.